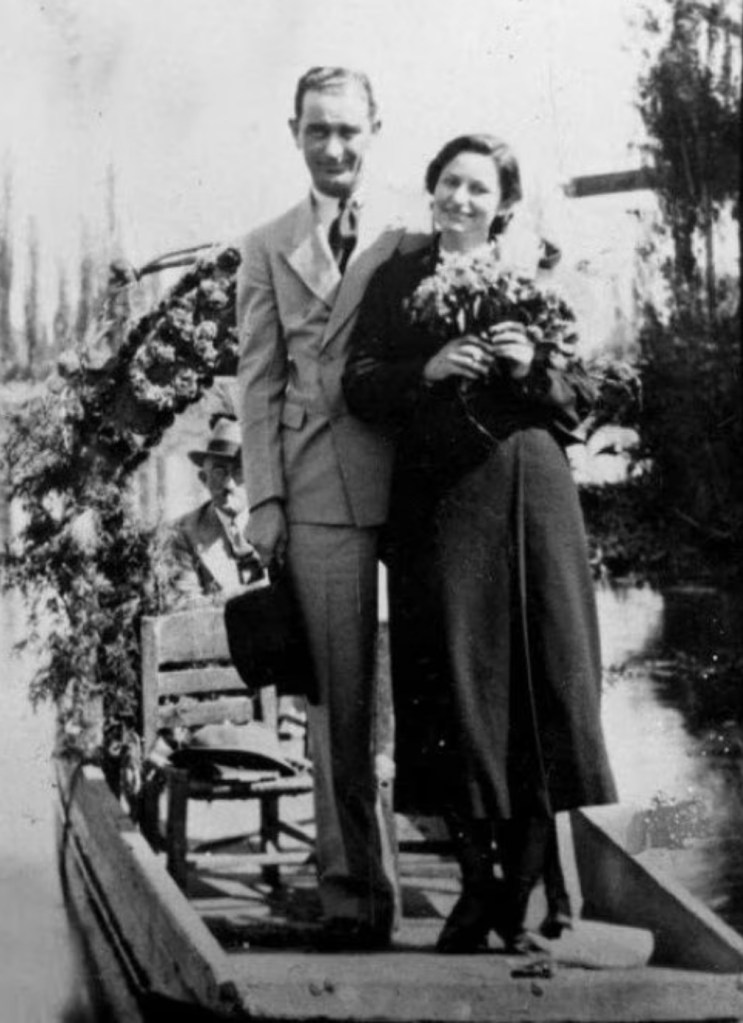
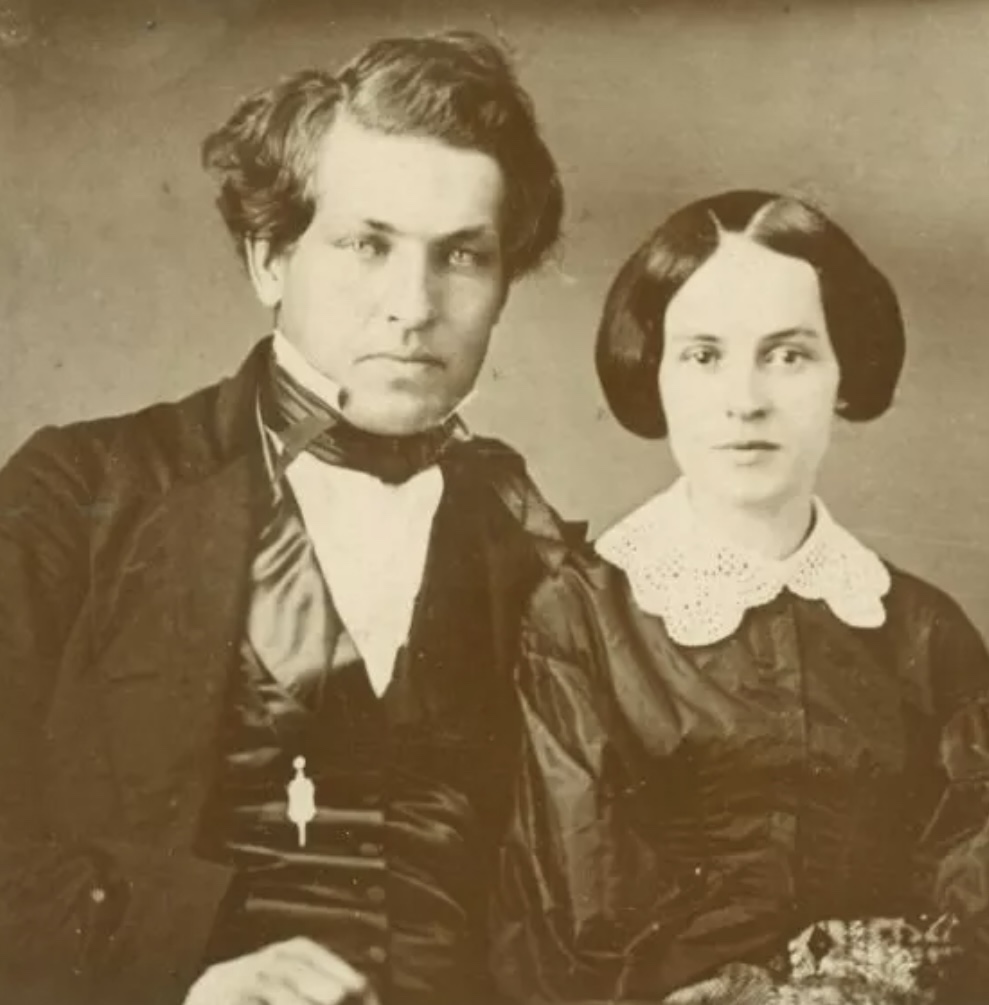
Today in American History…Lyndon Johnson and Claudia “Lady Bird” Taylor were married on November 17, 1934 in San Antonio, Texas.
Lyndon and Lady Bird Johnson on their honeymoon in 1934
Lyndon and Lady Bird were introduced by a friend in 1934. She had aspirations of leaving Texas to become a teacher in Alaska or Hawaii when they first met. But upon meeting him she said she was drawn to him “like a moth to a flame.”
He was a Congressional Aide at the time with political aspirations. His personality was abrupt and forward unlike the more reserved and pragmatic Lady Bird. On their first date, he proposed marriage to her which took her by surprise and she wanted to wait a year to possibly get to know one another more.
Lyndon Johnson was persistent and relentless in marrying Lady Bird and after ten weeks of writing letters and phone calls she relented and accepted his marriage proposal.
They were married within a day of her accepting his proposal and the ceremony took place at St. Mark’s Episcopal Church in San Antonio, Texas.
“He was the most outspoken, straightforward, determined person I’d ever encountered. I knew I’d met something remarkable – – but I didn’t know quite what” – Lady Bird Johnson
Last night I made Mamie Eisenhower’s Million Dollar Fudge recipe in honor of her birthday. I used her original recipe but tweaked it only by using semi-sweet chocolate bits for the entire recipe. It came out delicious and the hardest part was letting it cool for a few hours (couldn’t wait to eat it!)
P.S. I also used chopped walnuts in the recipe in the place of “nut meats.”
Apple Pie is truly one of the most iconic dishes in our country. It’s served at cookouts, holidays…Thanksgiving…it’s one of those food items that represents our country.
There is the popular saying “As American as Apple Pie” which was first used in the early 1800s but didn’t become popular until World War II.
The phrase became common for soldiers to say “for mom and apple pie” when speaking to journalists about why they had enlisted in the war. Since World War II, the phrase has been used for anything that symbolizes patriotism in our great land.
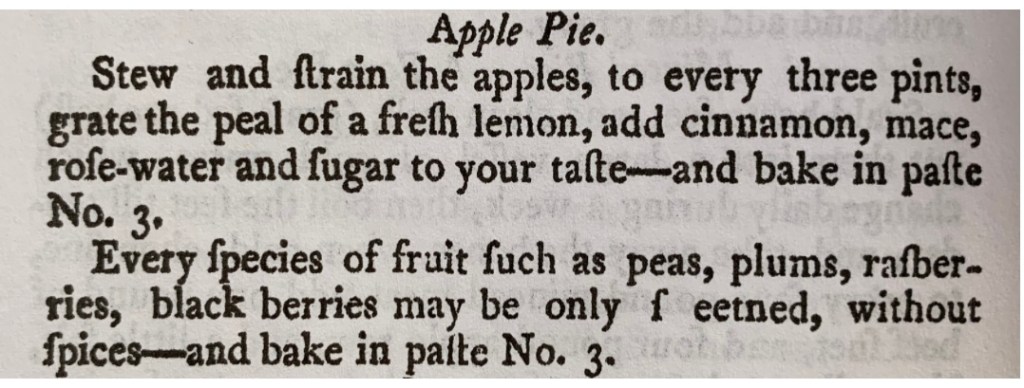
Apple Pie was first introduced to the new colonies by European settlers and quickly became popular. The recipe for Apple Pie was first published in 1796 in America’s first cookbook, American Cookery by Amelia Simmons. Here is Amelia Simmons recipe for Apple Pie:
“Stew and strain the apples, to every three pints, grate the peal of a fresh lemon, add cinnamon, mace, rose-water and sugar to your taste – and bake in paste No. 3.
Every species of fruit such as peas, plums, rasberries, black berries may only be sweetned, without spices – and bake in paste No. 3. “
From the book, American Cookery by Amelia Simmons published in 1796
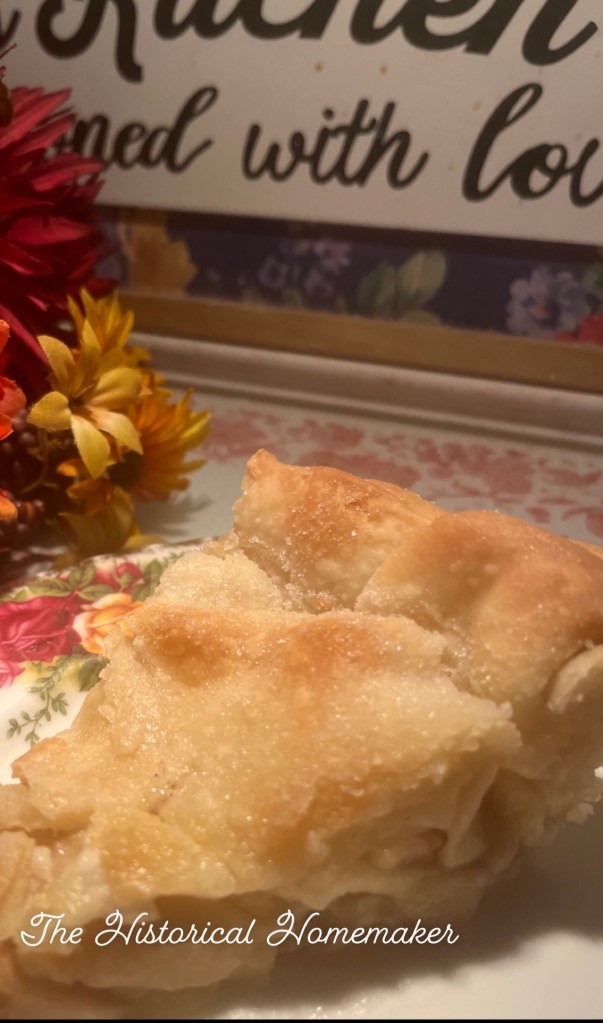
Homemade Apple Pie
Ingredients
5 cups (5 apples) thinly sliced, peeled medium apples (I used Honeycrisp Apples)
¾ cups granulated sugar
2 tablespoons all-purpose flour
¾ teaspoon ground cinnamon
¼ teaspoon salt
⅛ teaspoon ground nutmeg
1 tablespoon lemon juice
1 package of prepared pie-crust, bake according to instructions and set aside.
Directions
Preheat your oven to 425 degrees.
Peel 5 medium apples and slice them thinly until you have 5 cups.
In a large bowl, combine all the filling ingredients minus the apples and lemon juice. Mix well.
Add lemon juice and apples into the mixture and coat the apples thoroughly.
Pour the mixture into the prepared pie crust.
Add the top layer pie crust and seal the top and bottom together. You can crimp or fork the edges…however you personally like for your edges to be designed.
Take a knife and cut thin slices on the top of the pie to add ventilation while baking – you want those apples to be softened when you finally remove from the oven.
Before going into the oven, line the edges of the pie with aluminum foil for the first 15-20 minutes of baking. This will prevent the crust from burning.
Put the pie into oven, with the aluminum foil wrappings, for 15-20 minutes and remove.
Using a pastry brush, brush melted butter all over the top crust of the pie. Then sprinkle granulated sugar.
Put back into the oven for another 20-25 minutes until the crust is golden brown and the apples are softened.
Remove from the oven. Cool for 2-3 hours before slicing and serving.
Enjoy your pie! Maybe even add some vanilla ice cream on top 😋
Today in American History…James Garfield married Lucretia Randolph were married on November 11, 1858 at the home of her family in Hiram, Ohio.
James and Lucretia Garfield during their engagement
It wasn’t an easy marriage for both at first. They had different temperaments and were from different backgrounds – he was outgoing, social and friendly. She was more reserved and studious. The marriage was one that they felt was the “right thing to do” and they went forward with it even though both had their misgivings about the impending marriage.
During the first five years, he spent a lot of time away from home and it has been written that they only spent twenty weeks together during those years.
She was an avid diary writer and during one of his visits home, she shared her writings with him on how much she loved him and wanted to be a good wife, mother and longed for his affections. It was after this that they decided to do whatever it took to make amends in their marriage and everything turned around for them in a positive and loving way.
She often referred to the beginning of their marriage as the “dark years” but they would go on to have a successful and loving marriage for the rest of their years together until his tragic death on September 19, 1881 due to the injuries from the assassination attempt on his life on July 2, 1881.
In a letter written to Lucretia in December 1867, he wrote:
“We no longer love because we ought to, but because we do. Were I free to choose out of all the world the sharer of my heart and home and life, I would fly to you and ask you to be mine as vou are.”
In a letter written to James in September 1870, she wrote to her husband:
“…I stopped amazed to find myself sitting by our fireside, the loved and loving wife, lifted up from the confusions and out from the entanglements… felt that we are not living on the same plain [sic] as heretofore, that we are scarcely the same beings, but like conquering sovereigns we live in high isolation, wedded in heart and soul and life.”
I’m incredibly proud to be part of a family that has served our country from The Revolutionary War to the modern era.
To each and all of you that have served I humbly want to say thank you. Today is a day to honor you and all of your sacrifices that you’ve made to protect and to serve our beloved country.
You are true American heroes.
My grandfather was a part of “The Greatest Generation” My Uncles My father served in the US Army and was an Army Medic My cousin served in the US Army during Dessert Shield/Dessert Storm
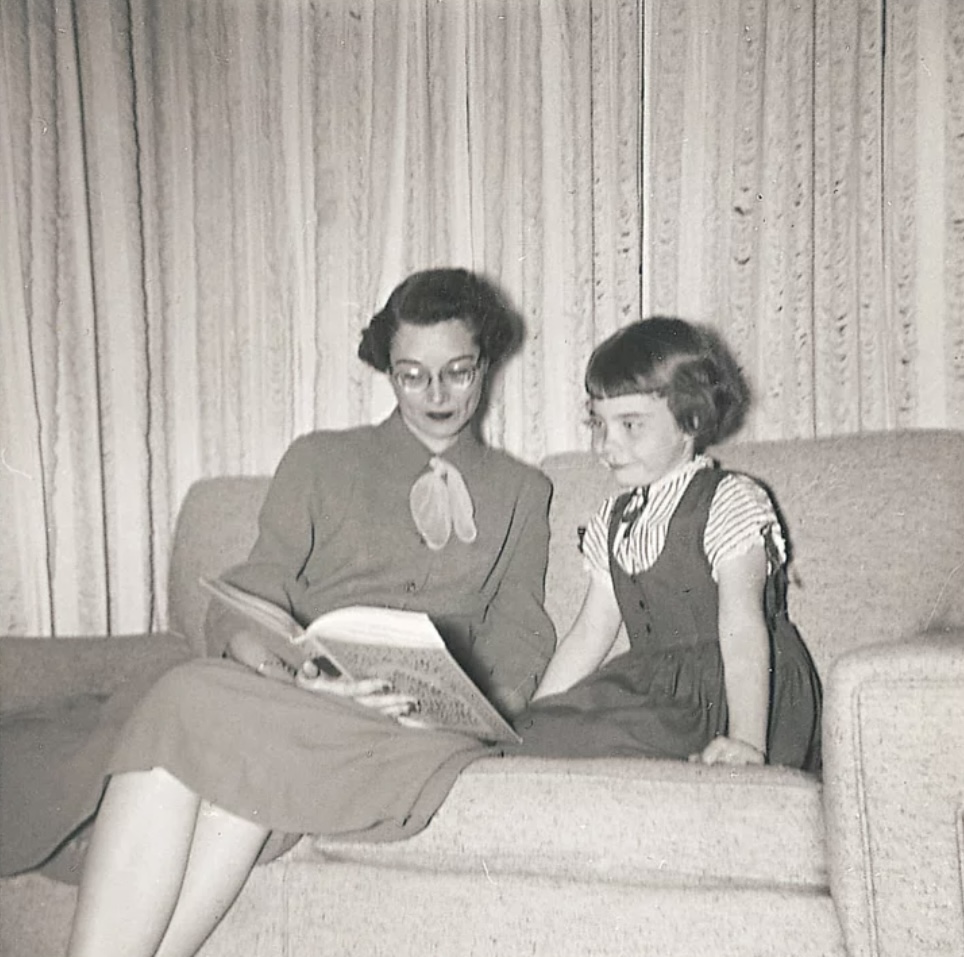
Today in American history…former First Lady Laura Bush was born on November 4, 1946 in Midland, Texas.
Laura Bush and her mother, Jenna Welch.
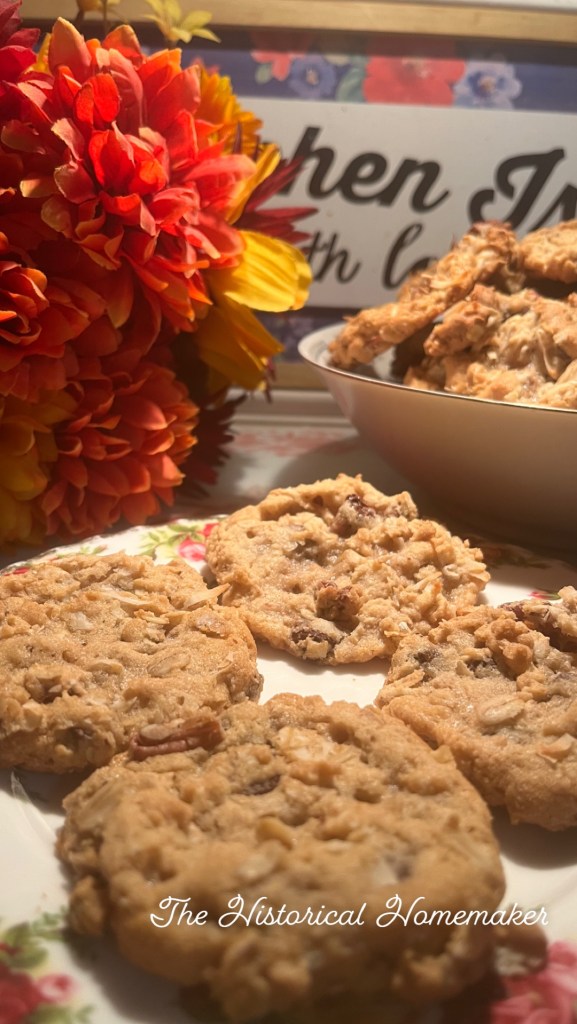
Several years ago, Family Circle Magazine would hold a cookie bake off during each Presidential election season. The contest would be between the Presidential candidates wives aka the potential future First Ladies. Readers would then vote for their favorite cookie and it was said that whoever’s cookie won the contest – their husband would win the Presidential election.
In the year 2000, Tipper Gore and Laura Bush made their favorite cookies for the contest. Tipper Gore made Ginger Snaps and Laura Bush made her Cowboy Cookies. Laura Bush’s cookies won and well…the rest is history 🇺🇸
Laura Bush’s Cowboy Cookies
Ingredients
3 cups all-purpose flour
1 tablespoon baking powder
1 tablespoon baking soda
1 tablespoon ground cinnamon
1 teaspoon salt
1 1/2 cups butter, room temperature
1 1/2 cups granulated sugar
1 1/2 cups light-brown sugar, packed
3 eggs
1 tablespoon vanilla extract
3 cup semisweet chocolate chips
3 cups old-fashioned rolled oats
2 cups sweetened flake coconut
2 cups chopped pecans
Directions
Heat oven to 350 degree F.
Mix flour, baking powder, baking soda, cinnamon, and salt in bowl.
In 8-quart bowl, beat butter on medium speed until smooth and creamy, 1 minute. Gradually beat in sugars to combine, 2 minutes.
Add eggs, one at a time, beating after each. Beat in vanilla.
Stir in flour mixture until just combined. Add chocolate chips, oats, coconut, and pecans.
For each cookie, drop 1/4 cup dough onto ungreased baking sheets, spacing 3 inches apart.
Bake in 350 degree F oven 17 to 20 minutes, until edges are lightly browned; rotate sheets halfway through.
Remove cookies to rack to cool. Enjoy!
Recipe is from the George W. Bush Presidential Center
Today in American history…Abraham Lincoln married Mary Todd in the parlor of her sister’s home in Lexington, Kentucky on November 4, 1842.
Mary Todd Lincoln’s White Almond Cake was a favorite of the Lincoln family. In my former bakery, we used to refer to as “the courtship cake” because Mrs Lincoln often made this during their courtship and I like to think it won his heart. The cake was often made for special family events. It is also documented as being on the dessert table at their home in Springfield, Illinois, for the celebration of President Lincoln being first elected to the Presidency.
I have read many books regarding the lives of Abraham and Mary Todd Lincoln. What has always peaked my interest is how they came from such diverse backgrounds – Mary Lincoln was raised in privilege with servants in a large home in Lexington, Kentucky. She was well educated which wasn’t common for women in that time. Her family were close friends with Henry Clay and she was once courted by Stephen Douglas. Abraham Lincoln’s life was the complete opposite – born in a log cabin with a dirt floor in the wilderness. He had to be a self-learned person and educated himself through borrowing books from neighbors and friends. Eventually he would become a very popular lawyer and debater.
Her family was against the impending marriage and felt he was beneath her. President Lincoln was so unsure of the engagement that he actually called off the first engagement.
In the end, love conquers all and they reunited in the Fall of 1842 and decided to marry regardless of what the naysayers thought. At the wedding, President Lincoln gave Mrs Lincoln a wedding band inscribed with the words “Love is Eternal.”
Abraham Lincoln and Mary Todd wedding. Source: Print by Lloyd Ostendorf
The recipe that I used was from the book, Lincoln’s Table, by Donna D. McCreary and was adapted by Janice Cooke Newman.
Mary Todd Lincoln’s White Almond Cake
Ingredients
1 Cup blanched almonds, chopped in a food processor until they resemble a coarse flour
1 Cup butter
2 Cups sugar
3 Cups flour
3 teaspoons baking powder
1 Cup milk
6 egg whites
1 teaspoon vanilla extract
confectionary sugar
Directions
Preheat oven to 350 degrees. Grease and flour a bundt cake pan.
Cream butter and sugar. Sift flour and baking powder 3 times. Add to creamed butter and sugar, alternating with milk. Stir in almonds and beat well.
Beat egg whites until stiff and fold into the batter. Stir in vanilla extract.
Pour into prepared pan and and bake for 1 hour, or until a toothpick inserted comes out clean. Turn out on a wire rack and cool. When cool, sift confectionary sugar over top.
A basic white frosting sprinkled with almonds was also popular.
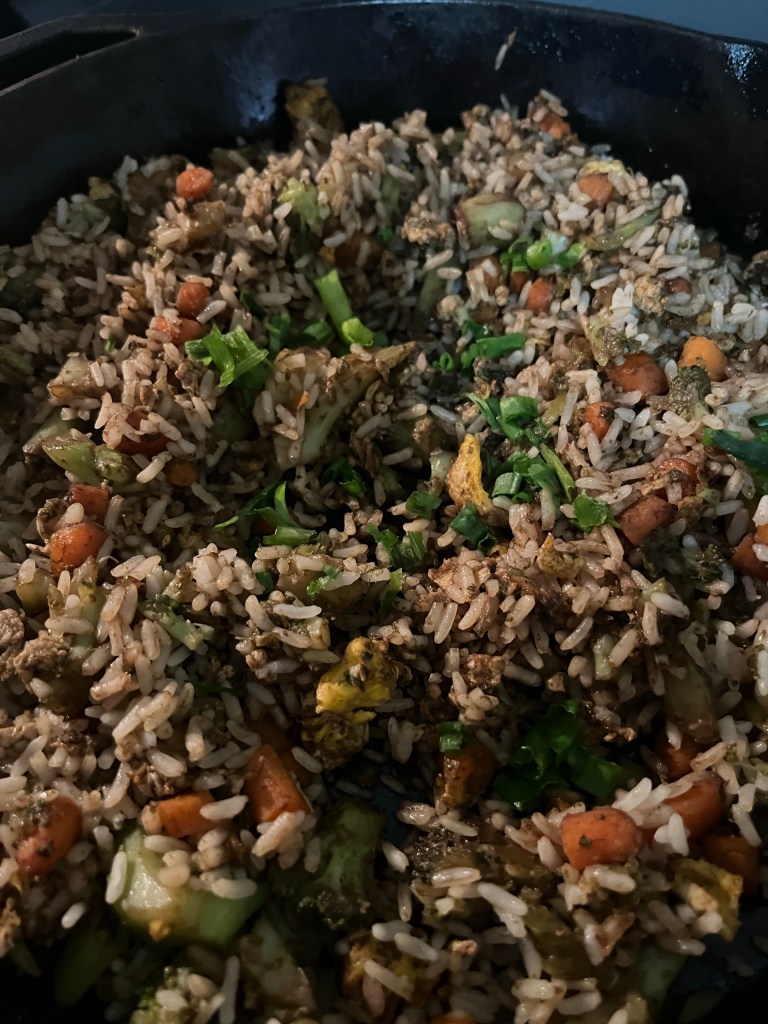
It’s Saturday evening and I needed to whip up sometime fast for my hungry family. This recipe is so easy to make and you will be surprised how quickly it all comes together. I was able to serve dinner in less than thirty minutes so this would make a great 30 minute meal to add to your collection of meals to make in a hurry – and most importantly? Super easy!! I love super easy!
Sticky Honey Butter Shrimp w/Homemade Fried Rice
Ingredients for Sticky Honey Butter Shrimp
1/2 cup Honey
1/4 cup Soy Sauce
3 tablespoonfuls of lemon juice
1 pound Large Shrimp peeled and deveined (I used frozen shrimp and quickly thawed according to package directions)
2 Tablespoons Butter
Green Onions for garnish
Directions
In a small bowl whisk honey, soy sauce and lemon juice together. Add half of the sauce to the shrimp and marinade for 30 minutes in the refrigerator.
In a medium sized skillet add the butter and melt on low heat. Add the shrimp. Season with salt pepper if desired.
Turn the heat up to medium high. Cook until the shrimp turns pink – will be about 2 minutes on each side.
Add the reserved marinade and pour over the shrimp. Cook until the sauce starts to thicken and coats the shrimp.
Garnish with green onions.
Ingredients for Homemade Fried Rice
2 cups cooked white rice
2 tablespoons olive oil
2 cups cooked broccoli and chop into small pieces
1 cup cooked carrots, diced into small pieces
1 onion diced (optional)
2-3 tablespoons of soy sauce (more or less to taste)
2 eggs, lightly beaten
Optional: 2 tablespoons green onions, chopped
Note: You can use any vegetables that you prefer. Some ideas are diced bell peppers…peas…onions…add water chestnuts…as long as you are careful to use the proportions correctly. This is a great recipe because it allows you to be creative with the veggies.
Directions
Preheat a large skillet to a medium heat. Add the olive oil and once heated add the vegetables and soy sauce. Cook until tender.
Slide the veggies to the side of the skillet and pour the beaten eggs onto the other side of the skillet.
Using a spatula, scramble the eggs.
Once the eggs are cooked, mix the eggs with the vegetable mixture.
Add the rice to the veggies and egg mixture. Pour more soy sauce on top if desired.
Stir and fry the rice and veggie mixture until warmed through and combined.